
Introduction
In this tutorial, I will talk about installing steamos in virtualbox. The reason, I wanted to do this was to play around and see how they have put together a debian distribution. One thing, I noticed from my installation was, despite valve’s suggestion in their FAQ, I would not recommend executing ~/post_logon.sh after installation, because it removed dkms and necessary drivers, that were necessary to boot the OS. I guess, this step was the step to make steamos boot directly into big picture mode. In our case, you will have to select SteamOS from login manager and login into user account named steam to login to the big picture mode. If you want to run above script anyway, at least make a copy of the vdi file, after you have updated the steam client. File size is no more than 4G, if you have selected dynamically expanding disk in virtualbox. Also, as suggested by some posts, there was no need for me to remove nvidia binaries after installation.

Download
Use any one of the following links (direct or torrent magnet) to download SteamOSInstaller.zip file. Make sure, to check the hash using subsequent links. In a typical linux distro you can use following command to check hash of a file.
$ md5sum SteamOSInstaller.zip
bd4f7cdc0a6444798cfb65778f4e6f98 SteamOSInstaller.zip
- iso link
- magnet:?xt=urn:btih:1e4dae83371ba704d5d89e1828068ef0c4151e32&dn=SteamOSInstaller.zip&tr=udp%3A%2F%2Ftracker.openbittorrent.com%3A80%2Fannounce&tr=udp%3A%2F%2Ftracker.publicbt.com%3A80%2Fannounce
Unzip the file (say you rename the directory to steamos), and create an iso.
$ genisoimage -o steamos-1.0-uefi-amd64.iso -r -J steamos/
One thing to note is, you might not be able to use above iso to boot using a flash drive to install steamos in your hardware. The resulting iso, works perfectly in virtualbox. If you need to create an iso to install steamos on your hardware, use this link instead.
Installation
Create a typical virtualbox entry with following information. This is minimum setting. More is always better.
OS Type: Linux
Version Type: Debian (64 bit)
Memory (RAM): Around 1822MB
Disk Space: Around 10G
Processor: 2 CPU
Enable EFI (special OSes only): Checked
Video Memory: 128MB
Enable 3D Acceleration: Checked
Also make sure, virtualbox-guest-iso, virtualbox-host-dkms, virtualbox-host-modules are also installed. Attach the iso and complete the installation.

If after reboot the login screen gets stuck in EFI shell, use following command to start grub.
fs0:\EFI\steamos\grubx64.efi
After inserting guest additions cd image, grub might be available in fs1. Therefore, make sure to run grubx64.efi using proper drive prefix.
After the installation is completed, boot into recovery mode and install virtualbox linux additions. For this, select “Insert Guest Additions CD image” from the virtualbox menu. Without this step, I was not able to get to the login window.
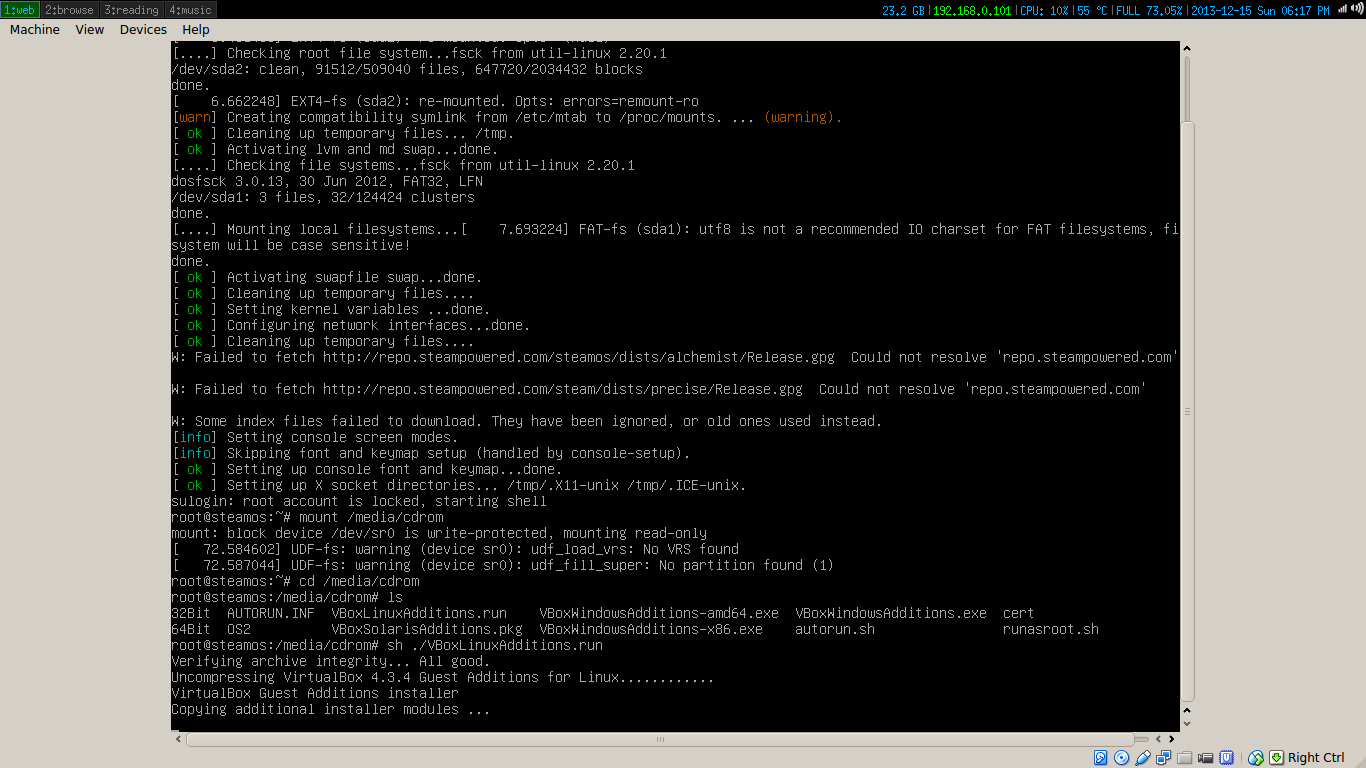
# mount /media/cdrom
# cd /media/cdrom
# sh ./VBoxLinuxAdditions.run
Now, you should be able to reboot and login into steamos.
Configure
There are two user accounts in steamos namely steam and desktop. The purpose of account named steam is to login into steam client and that of desktop is to perform initial administrative tasks, since this is the account that has administrative privileges.

If you want to use steamos as a proper debian installation, you need to add some repositories in /etc/apt/sources.list and run “apt-get update”. For that, use this link to generate the repository list.

If you select Main, Contrib, Non-free as sources, you should be able to install flash, sound mixer with following command.
sudo apt-get install flashplugin-nonfree qasmixer
Now, you can enable audio by turning on and increasing the slider on mixer and pcm on qasmixer.
Conclusion
In this tutorial, I listed steps on how I installed steamos into a virtualbox instance. I hope this was helpful. In future, I am sure the process is going to be a lot easier.


Thanks for the links! When I reboot SteamOS in Virtualbox the X-Server does not want to start!
Thanks, it works perfectly!!!
This might work, but you have misunderstood some major things. The purpose of the steam account is only to bootstrap steam into a fitting environment. The desktop account is the main login, and you are supposed to run the post installation script using sudo sh ~/post_install.sh, which is actually one of the final steps of the installation, not “post” installation. If you ever see the login screen you are still within the installation environment(!!!)
after finalizing the install the drivers go all hawwire again, and you will not be able to chose what to boot in grub. So you need to alt+ctrl+F1..F6 into tty, change the grub setting to show you a menu, boot into recovery, reinstall VBoxGFuestAddons etc.
After that the EFI boot line seems to go away and you need to boot manually everytime, and even updating the drivers doesn’t give you 3d support, so Gnome goes into fallback mode. I’m trying to find a complete guide to fix this but most ppl think they’re done when they’re still inside the installation environment..
This tutorial is meant only for those who want to see how the steamos is built (only generally, and I agree that without ~/post_install.sh it is no more than a regular debian install). I have seen people those that don’t use the clonezilla image (the 4g one), use this one to install debian, and as you said execute ~/post_install.sh as the final step (which gets rid of login screen and couple of drives, and in vbox case dkms and vbox drivers). Since, in my step ~/post_install.sh deleted necessary driver files, I considered it as post install step and had to resort to login into steam from a login manager as the final step in the process. You don’t need to get confused about what I said as the final step.
It is not meant as proper steam installation tutorial, because otherwise, I would also take care of creating a proper iso, that would boot on any machine.
If you have some suggestions about how to get a proper environment (without the login screen) and without it deleting any intel or vbox driver files, that would be more than welcome. Thanks for the reply.
ok, thank you for the clarification.
I’m trying to figure it out now. Seems it gets alot of stuff to brake. But from what I can guess it’s not really that it deletes things, but it doesn’t copy them. the script prepares alot of things in /target/ that is probably made the main root folder later in the clonezilla step. So it doesnt seem it’s as simple as making sure it doesn’t delete stuff, so it seems what needs to be done is to figure out what part in debian makes it work that is missing in steamOS. :O